Preparing artwork for folder printing requires accuracy, planning and an understanding of how print production works. Presentation folders involve multiple panels, fold lines and optional finishes, meaning any oversight in setup can lead to misalignment, cracking or rejected files.
For designers, marketers and businesses aiming for consistent, high-quality results, this guide explains how to set up bleed correctly, position folds and creases, prepare Spot UV mask layers and export a reliable print-ready PDF. Each section is designed to help you reduce errors and achieve a polished, professional finish.
Bleed ensures background artwork extends beyond the final trim edge. If trimming shifts even slightly during finishing, bleed prevents thin white edges appearing on the final folder. This is especially important across multi-panel designs and pocket areas.
Most UK printers recommend at least 3 mm bleed on all edges. For presentation folders, every panel, pocket and tab must be treated with the same accuracy to ensure a seamless final product.
Please take a look at our clear explanation of bleed in print.
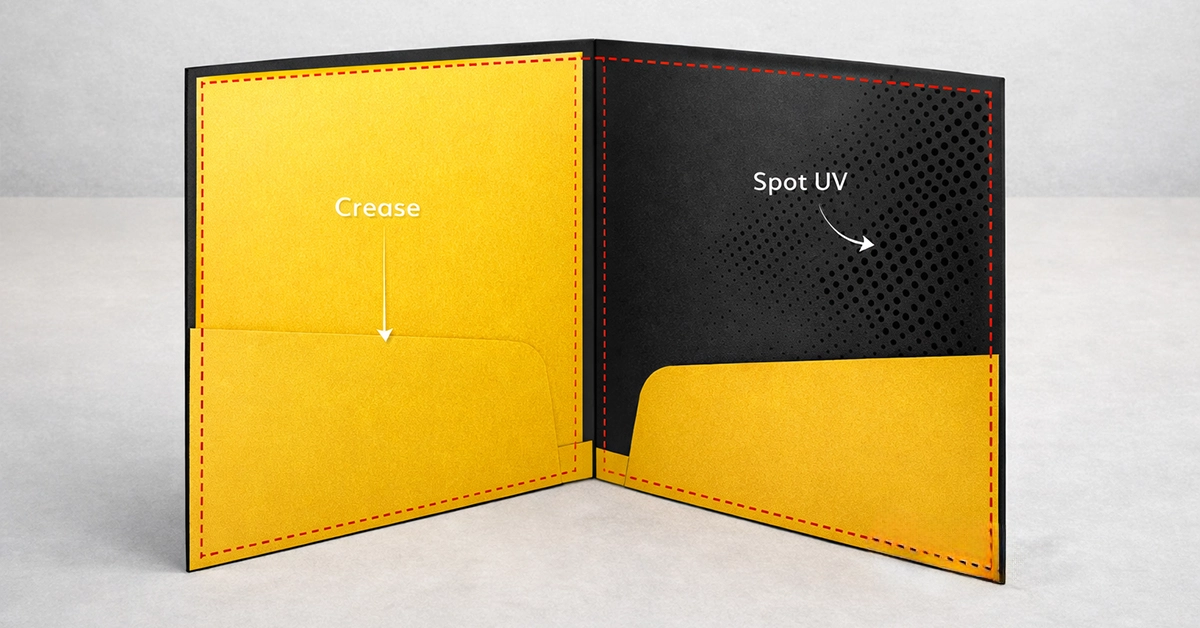
Folders are more structurally complex than flat printed items. Each panel, spine and pocket affects how artwork wraps and folds. Accurate crease planning prevents distortion and ensures that designs land exactly where intended once assembled.
If available, always work from a folder-specific template supplied by your print partner.
Spot UV adds a glossy varnish to selected areas of your artwork, creating visual contrast and a premium tactile effect. When applied correctly, it enhances key design elements such as logos, patterns or graphic accents.

Spot UV is most effective on matt or soft-touch laminated card stocks. Uncoated materials absorb varnish, reducing clarity, while gloss-coated surfaces offer less contrast.
For more guidance on Spot UV preparation, take a look here.
| Artwork Element | Recommended Practice | Reason |
|---|---|---|
| Bleed | Minimum 3 mm on all edges | Ensures clean trimming |
| Safety Zone | 5–7 mm inside trim | Protects key content |
| Clearance for Folds | Keep artwork away from creases | Prevents distortion and cracking |
| Spot UV Spacing | 1.5–3 mm from folds/edges | Avoids cracking and mis-registration |
| Image Resolution | 300 dpi minimum | Ensures crisp print quality |
| Colour Mode | CMYK | Prevents colour shifts from RGB |
| PDF Export | PDF/X-1a or equivalent with bleed and crop marks | Ensures consistent output |
Exporting a properly prepared file is vital to achieving consistent results. A print-ready PDF prevents colour shifts, missing elements and layout issues.
Create a single flat-plan layout or individual pages depending on the folder design.
Export as a press-ready PDF with bleed and crop marks.
Ensure all artwork is designed in CMYK.
Use 300 dpi images at full size.
Embed fonts or convert them to outlines.
Supply Spot UV artwork as a separate PDF or a named spot layer.

For reliable export guidance, Adobe offers a clear preflight overview:
https://helpx.adobe.com/acrobat/using/preflight-profiles-acrobat-pro.html
Even experienced designers encounter errors when producing folder artwork. Understanding the most frequent issues helps you avoid production delays and unnecessary reprints.
To ensure predictable and high-quality folder printing, incorporate these practical steps into your workflow:
Producing high-quality presentation folders starts with strong artwork preparation. By applying the correct bleed, accurately positioning fold and crease lines, preparing precise Spot UV mask layers and exporting a clean, print-ready PDF, you can ensure your folders print beautifully and perform as intended.
If you would like templates, artwork checks or guidance for your next folder project, our team can help you prepare files with confidence. Get in touch to discuss your artwork or request support for upcoming projects.

Unit 4-10 Stanton Road Ind. Est.
Stanton Road
Southampton
Hampshire
United Kingdom
SO15 4HU