• Free Delivery (UK Mainland)
  • Professional Design Services
  • 4.9 Google Review Rating
  • Friendly Team of Experts
  • Help & Support Guides

How to Ensure Accurate Panel Alignment and Avoid Print Errors: A Complete UK Guide

5–7 minutes

Accurate panel alignment is essential in print production, particularly for scratch card printing, vouchers, loyalty products, and any item requiring precise placement of panels or variable data. Even a shift of 1 mm can cause a panel to sit off-centre, reveal confidential information, or interfere with the design. These issues can lead to wasted stock, campaign delays, and damaged brand trust.

This refined guide explains why alignment problems occur, how designers and marketers can prevent them, and the best practices used by professional printers. It also includes a reference table to support decision-making during artwork setup and production.

Why Panel Alignment Matters for High-Quality Printing

Accurate alignment directly impacts:

  • Professional appearance
  • User experience
  • Campaign performance
  • Confidentiality and security (especially with prize codes)
  • Production efficiency and cost management

Misalignment is consistently reported as one of the most common print errors across the industry. For scratch-off cards, gift vouchers, membership passes, and promotional materials, alignment issues can compromise both the visual quality and the function of the product.

Why Print Misalignment Happens: Understanding Tolerances and Movement

Mechanical tolerances are a natural part of commercial printing. Both digital and litho presses operate within movement ranges that can reach 0.5–2 mm depending on run length, stock type, and environmental conditions.

Common causes of misalignment include:

  • Minor movement during print passes
  • Paper stretch or shrinkage caused by heat or moisture
  • Finishing processes such as laminating, foiling, or die-cutting
  • Heavy ink coverage affecting paper stability
  • Natural machine variance across long runs

By understanding these tolerances, designers can create artwork that is resilient under real production conditions.

Artwork Setup Mistakes That Lead to Print Alignment Errors

A significant percentage of alignment issues originate in the artwork rather than on the press. Common design-related causes include:

  • Panels placed too close to trim edges
  • Missing or incorrect bleed
  • No safe zone for critical text or graphics
  • Confusing or merged layers for panel and data elements
  • Incorrect use of spot colours for panel areas
  • Artwork not matched to the exact cutter guide

To prevent issues, aim for:

  • A minimum 3–5 mm safe zone around essential elements
  • Accurate bleed on all sides
  • Clearly labelled and separated layers
  • Vector-based panel shapes for precision

Designing Artwork That Protects Against Alignment Drift

Thoughtfully designed artwork helps absorb mechanical movement during printing and finishing. Best practices include:

  • Positioning scratch-off or data panels centrally where possible
  • Avoiding thin borders around panel areas
  • Using vector shapes and grid structures for consistent spacing
  • Keeping text well away from trim and finishing features
  • Designing layouts that maintain visual balance even with small shifts

When in doubt, simplify panel shapes and increase spacing. A forgiving design is more reliable during production.

Alignment Risks and Prevention Techniques: Quick Reference Table

Alignment IssueTypical CauseImpactPrevention Technique
Scratch panel driftPress movement, finishing varianceOff-centre panels or incorrect revealIncrease safe zones, request hard proof, avoid tight borders
Cut line variationDie-cut shift or stock movementUneven trim or clipped graphicsUse generous margins, follow cutter guide precisely
Variable data mismatchIncorrect data mergingCodes misaligned with panel locationVerify CSV order, run test samples, lock panel layers
Artwork setup errorsMissing bleed, incorrect colour setupVisible trimming errors or misalignmentAdd correct bleed, use proper colour modes, label layers
Finishing distortionLaminating, foiling, heavy ink areasStretching or skewing of sheetsReduce ink coverage near panels, adjust spacing

Scratch-Off and Variable Data Printing: Why These Require Extra Accuracy

Scratch-off areas and variable data introduce an additional layer of risk because:

  • Hidden codes must align precisely under the panel
  • Any shift can expose sensitive information
  • Data merging must remain perfectly synchronised with artwork placeholders
  • Incorrect alignment compromises campaign integrity

To reduce these risks:

  • Label scratch-off and variable layers clearly
  • Request a panel overlay proof before signing off
  • Inspect sample batches before approving full production
  • Use consistent naming conventions for data fields
  • Confirm secure handling processes for personalised information

These measures significantly reduce the likelihood of misalignment or data mismatch.

Using Proofing to Catch Alignment Issues Early

Proofing is essential for preventing errors before large-scale production begins.

Soft Proofs

Useful for confirming layout, spacing, colours, panel position, and layer structure. They are an important first step but cannot show physical tolerances.

Hard Proofs

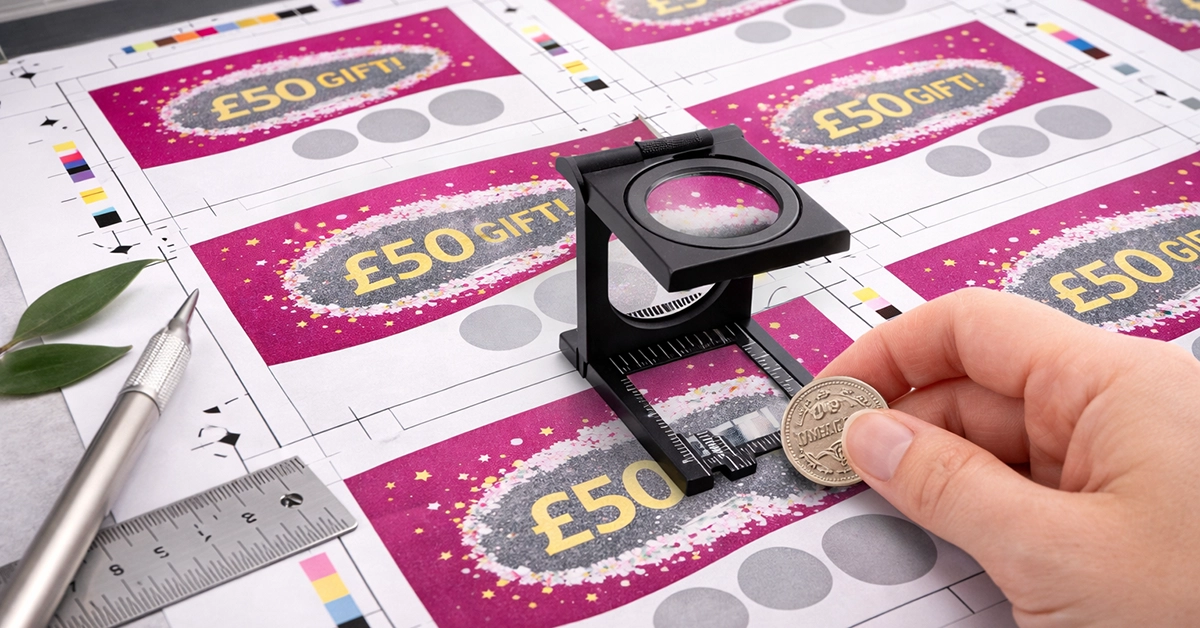
Highly recommended for scratch-off products or any item requiring precise alignment. Hard proofs allow you to inspect:

  • Panel position
  • Panel size and shape
  • Interaction with finishing effects
  • Legibility and coverage

Approving a hard proof offers reassurance and reduces risk for high-precision jobs.
How Finishing Processes Influence Alignment Accuracy

Finishing processes can introduce alignment shifts even when the print stage is flawless. Common contributors include:

  • Lamination rollers applying pressure
  • Die-cutting blades moving within tolerance
  • Creasing and folding operations
  • Foil stamping pressure
  • Application of scratch-off latex

Strategies to manage these variables include:

  • Using wider margins around finishing elements
  • Avoiding delicate borders near panel edges
  • Reducing heavy ink in areas prone to distortion
  • Requesting finishing tolerance specifications from your print supplier

Careful planning ensures that finishing complements the artwork rather than compromising it.

A Step-by-Step Workflow for Reliable Panel Alignment

Following a structured workflow significantly reduces alignment risks:

  1. Request the correct panel or cutter guide before starting artwork.
  2. Build artwork using proper bleed, safe zones, and labelled layers.
  3. Use vector shapes for all panels and alignment markers.
  4. Check alignment at 100% scale and against a grid.
  5. Verify CSV structure and data order for variable elements.
  6. Review soft proofs and panel overlays.
  7. Approve a hard proof for panel-sensitive work.
  8. Communicate with your print team throughout pre-press.

This workflow ensures accuracy from design through to delivery.

What You Should Expect from a Professional UK Printing Partner

A high-quality print provider should support you by offering:

  • Comprehensive pre-press checks
  • Clear explanations of tolerances and alignment expectations
  • Panel overlay proofs for review
  • Secure handling of variable data
  • Calibrated equipment for consistent alignment

Good communication and transparent processes create a smoother, more reliable experience.

Summary: Essential Tips for Avoiding Alignment Errors

  • Always design with print and finishing tolerances in mind.
  • Keep panels away from trim edges to avoid drift.
  • Label artwork layers clearly and apply correct bleed.
  • Use proofing to validate panel alignment early.
  • Allow for slight natural movement in your design.
  • Give variable data projects additional care and time.

Next Steps for Designers and Print Buyers

If you are planning a project that depends on precise panel alignment, early preparation makes all the difference. Strong artwork setup, clear communication, and attention to tolerances help ensure accurate results and minimise production risks.

If you’d like personalised guidance on preparing artwork, improving alignment accuracy, or planning a complex print job, feel free to ask for further support.

Site Logo
Part of the Inprint Group

Unit 4-10 Stanton Road Ind. Est.
Stanton Road
Southampton
Hampshire
United Kingdom
SO15 4HU
Affiliations

members of
© Copyright 2026 Inprint Group